How to Use LUTs in Premiere Pro in 4 Easy Steps
Last UpdatedSeptember 24, 2023
by
Anthony Gallo

Unlock the full potential of your video editing skills with the power of Look-Up Tables (LUTs) in Adobe Premiere Pro.
Whether you're a beginner or a seasoned editor looking to color correct footage, this guide will walk you through how to effectively apply and adjust multiple LUTs for your projects.
From using stock options within Premiere Pro to incorporating a custom LUT file for that unique color grade, in this article, I'll show you how to enhance your videos with LUTs in four easy steps.
How to Use LUTs in Premiere Pro?
Using Look-Up Tables (LUTs) in Adobe Premiere Pro can greatly enhance the color grading process by allowing a streamlined way to apply complex color correction and grading effects.
Here's a quick guide on how to use LUTs in Premiere Pro. 👇
1. Importing Your Footage
- Create a Project: Open Premiere Pro and create a new project or open an existing project.
- Import Footage: Import your footage into the project by dragging it into the "Project" panel or by selecting File > Import.
2. Applying the LUT
There are a wide range of free LUTs available within Adobe Premiere Pro. You can also opt to download and use custom LUT files if you're after a specific color grading for your next video project.
- Add Your Footage: Add your footage to Timeline by dragging your video clip from the "Project" panel to the timeline.
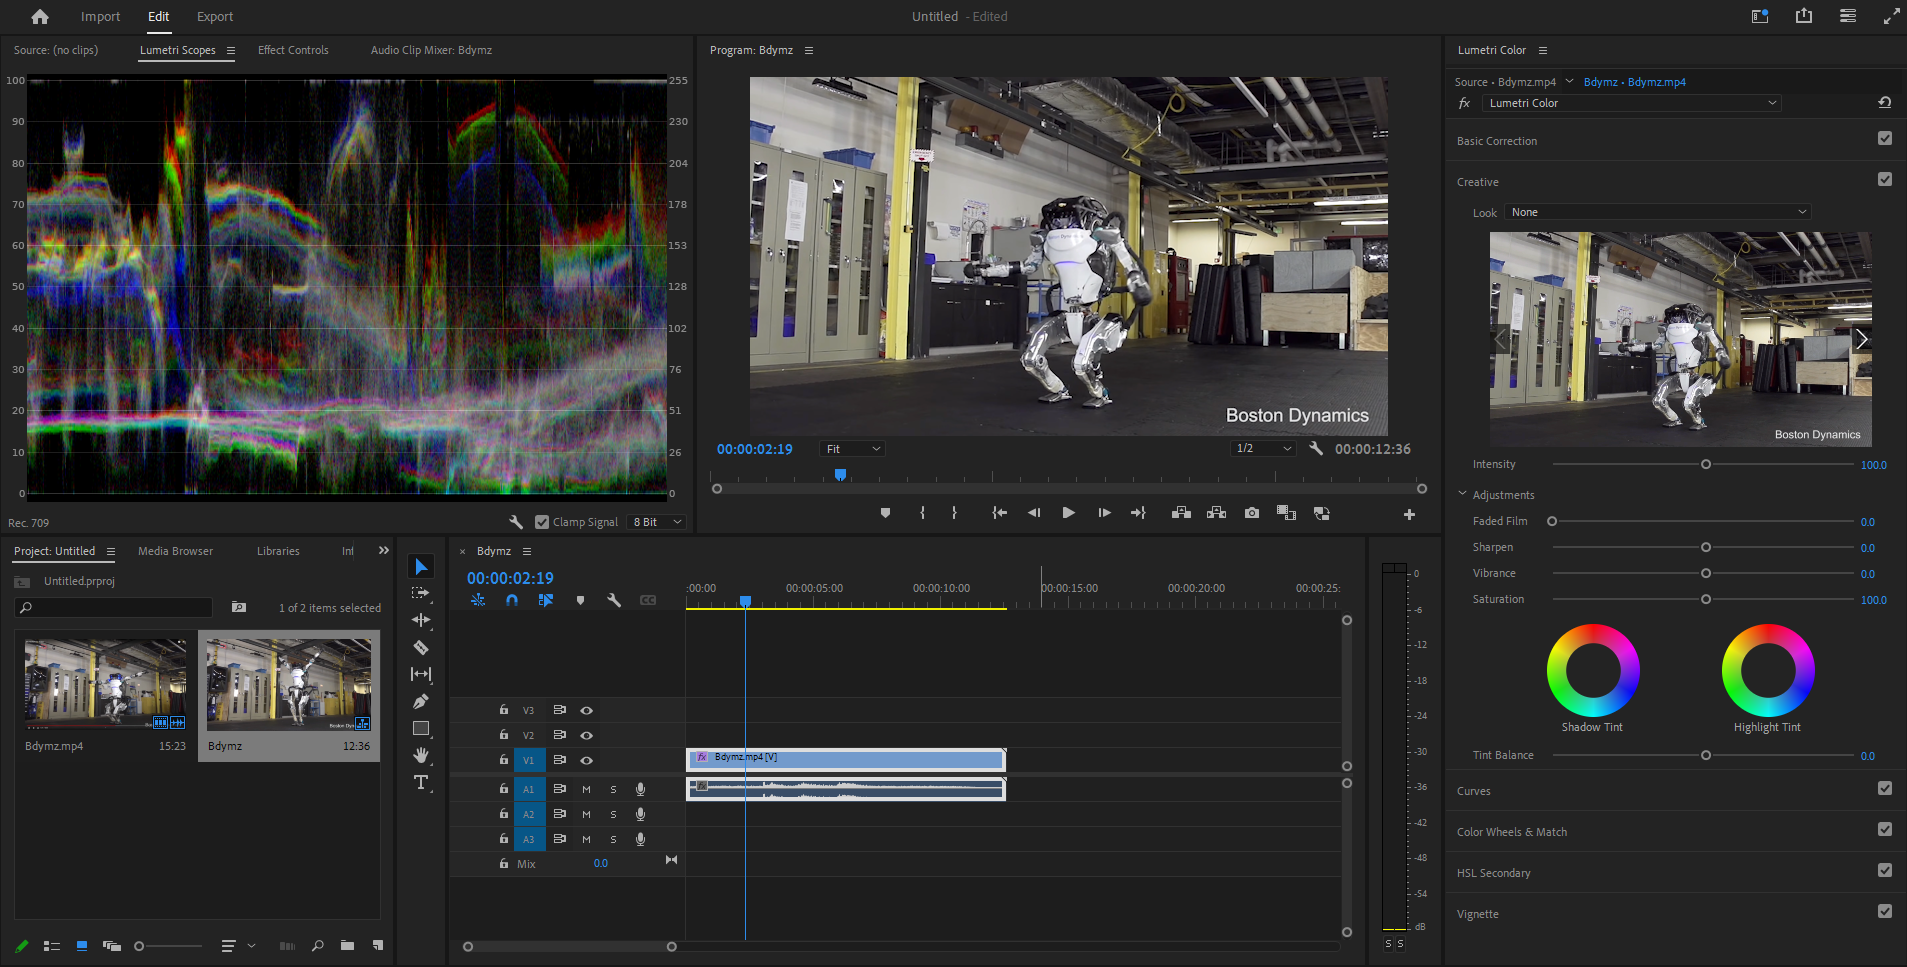
- Use the Color Workspace: You can change your workspace to the Color workspace by clicking Window > Workspaces> Color at the top of the Premiere window. This opens up the Lumetri Color panel.
- Find the 'Creative' Tab: Within the Lumetri Color panel, navigate to the "Creative" tab.
- Load the LUT: Click on the input LUT dropdown menu next to "Look" or click on the "Browse" button to locate and select from the input LUT dropdowns.
3. Adjusting the LUT

There are a range of sliders in the Creative tab that allow you to modify your LUTs in Premiere Pro. You can try playing with the following basic settings:
- Intensity Slider: After applying the input LUT in Adobe Premiere, you can adjust its intensity using the slider directly below the color style preview screen.
- Further Color Correction: You can add more color effects using the Lumetri Color tools in the same panel. You can use the Basic Correction tab to make additional adjustments like exposure, contrast, and saturation.
Pro tip: Click the "fx" button next to Lumetri Color to turn the color correction and LUTs on and off.
If you want to learn more about how to use the basic correction tab, color grading, and LUTs in premiere pro, check out 14-day film maker where we tell you exactly how to get the best results with LUTs and Lumetri Color!
4. Saving the Preset
Once you're satisfied with the color grading you can easily save the preset for your next video by:
- Clicking the hamburger icon at the top of the Lumetri panel
- Selecting "Save Preset" and giving it a name
This allows you to easily apply the same settings to other clips in the future. You can find your saved presets in the "Presets" folder in the effects control panel.
5. Export Your LUTs (Optional)
If you plan on using your LUT files in other applications such as Davinci Resolve or Final Cut Pro you can export your LUTs as a .cube file. Exporting a .cube file usually refers to saving only the color lookup table. It won't include any other effects or adjustments you've made in the Basic Correction panel.
- Click the hamburger icon at the top of the Lumetri panel
- Click export .cube and select your file path
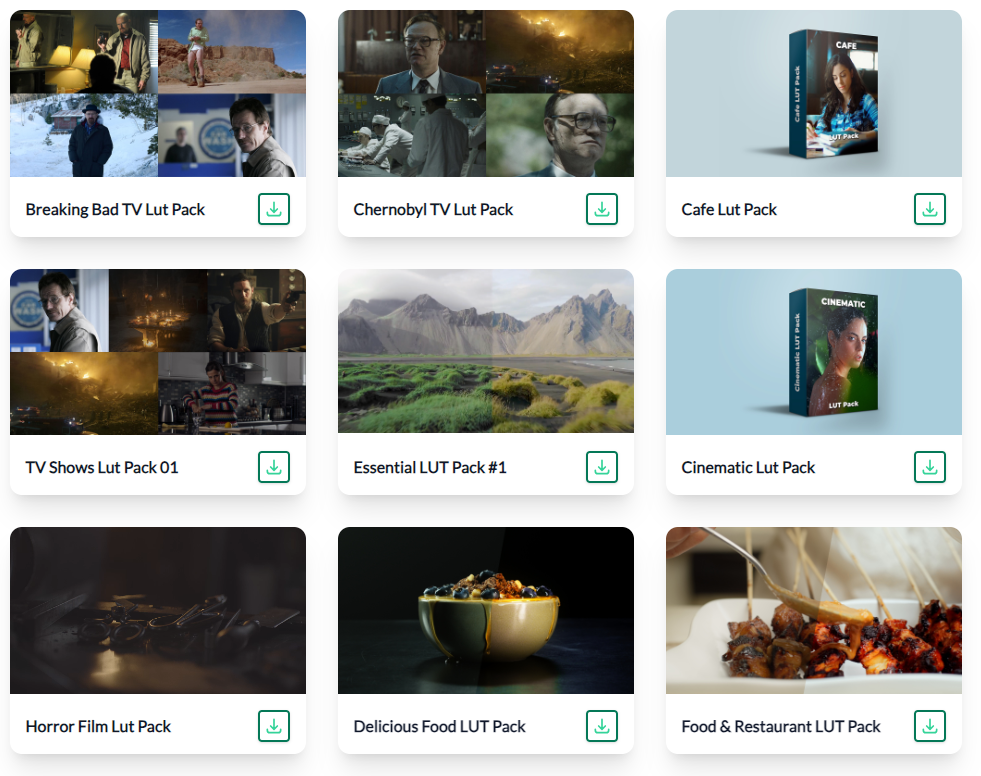
Where Can I Get Custom LUTs for Adobe Premiere Pro?
If you're looking for custom LUT files, motion graphics, transition effects, overlays, and more for Premiere Pro then look no further than Content Creator Templates. Simply identify the LUT files you're interested in, download, and install custom LUT files!
How Can I Install Custom LUTs for Adobe Premiere Pro?
Installing your custom LUT files is super simple and is simply a matter of saving or moving your .cube files to the right location.
- For Windows users: Save or move your LUTs to the following directory: C:\Program Files\Adobe\Adobe Premiere Pro 2023\Lumetri\LUTs\Creative
- For MacOS users: Click: Applications > Adobe Premiere Pro > Right click and select show package contents > Contents > Lumetri > LUTs > Creative. Copy and paste your LUTs here.
Remember, you'll usually need to restart Premiere Pro for your LUTs to appear in the "Look" drop down menu of the Creative panel.
FAQs
How do I Install .cube files Premiere Pro?
.cube files don't actually need to be installed, rather they need to be moved to the appropriate Premiere Pro folder:
- For Windows users: Save or move your LUTs to the following directory: C:\Program Files\Adobe\Adobe Premiere Pro 2023\Lumetri\LUTs\Creative
- For MacOS users: Click: Applications > Adobe Premiere Pro > Right click and select show package contents > Contents > Lumetri > LUTs > Creative. Copy and paste your LUTs here.
Restart Premiere Pro for your LUTs to appear in the "Look" drop down menu of the Creative panel and you're done!
Wrapping Up
Mastering the art of color correction in Premiere Pro is made significantly easier by installing LUTs.
These Look-Up Tables streamline the grading process, taking your professionally shot film to the next level. The Lumetri Color panel is your go-to workspace for applying and tweaking your LUTs. Once you've found the right look, saving your settings as a preset ensures consistency across future projects.
The ease of importing custom LUTs and adjusting them means you're always just a few clicks away from the perfect visual tone!

Anthony Gallo
Anthony Gallo is the cofounder of ContentCreator.com and lead educator in the online course 14 Day Filmmaker, that has taught over 100,000 aspiring creators how to shoot & edit professional video content with PRO and SMARTPHONE cameras.
Having created content in a variety of industries including commercial advertising, weddings, music videos, and hundreds of youtube videos, Anthony has amassed over 50 million views online and is constantly looking for new and engaging ways to create content and help others master this amazing craft.