How to Use Green Screen on CapCut (and Auto Cutout)
Last UpdatedFebruary 6, 2024
by
Anthony Gallo
Removing the background from your footage is an excellent way to make engaging transitions, or integrate green screen videos into your content creation.
In this guide, I'll show you the simplest way to remove the background from green screen video and any other footage you want to remove the background from!
How to Use Green Screen on CapCut?
Here's how to use green screen on CapCut and quickly remove any background.
1. Use Auto-Cutout in CapCut
With the addition AI tech into CapCut like text-to-speech and auto-cutout, removing green screen background is simple with the help of a video background remover tool.
CapCut has a built in auto cutout feature that makes removing the background from any footage super easy.
To remove green screen background in CapCut, or any other background for that matter, simply:
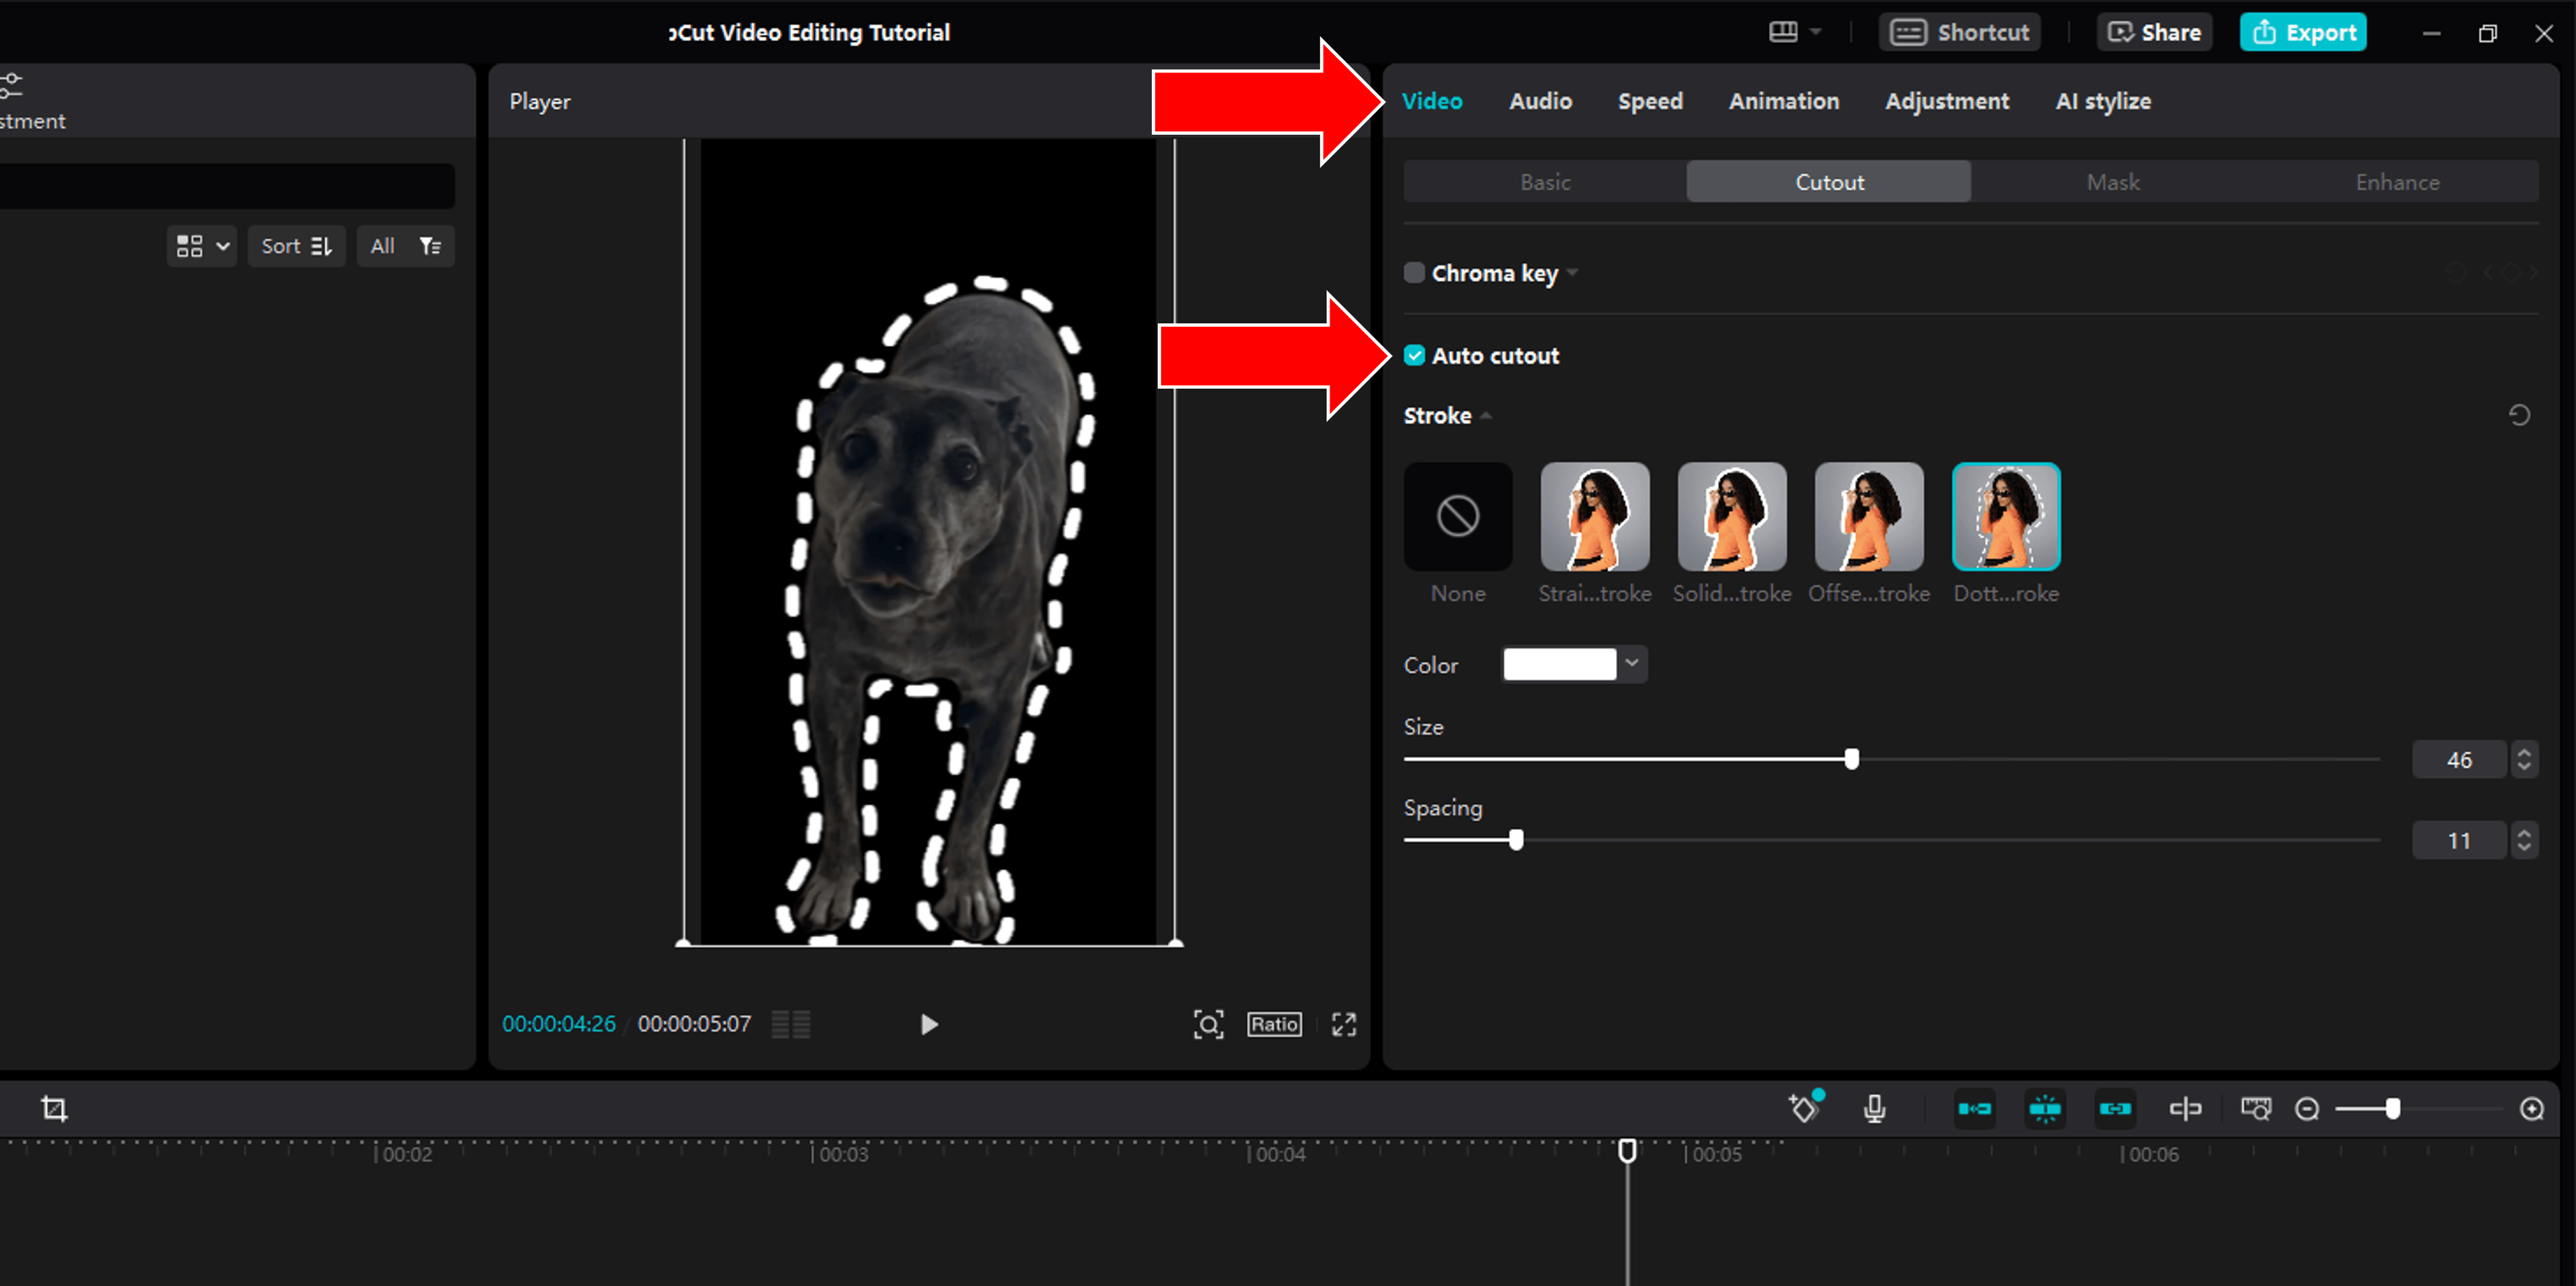
- Click to select the clip you want to remove green screen or background footage from
- In the Settings Panel in the top right, Click Video > Cutout > Auto Cutout
The drawback of using the auto cutout feature in CapCut is that it is built specifically for cutting out humans.
If you have green screen background footage of animals or other objects, the auto cutout feature might not work as well as you need. That's when you'll want to look into the chroma key feature. 👇
2. Use the Chroma Key Feature
The Chroma Key feature allows you to select a specific color from your video and make it transparent.
To use the Chrome Key feature to remove background from your green screen video in CapCut:
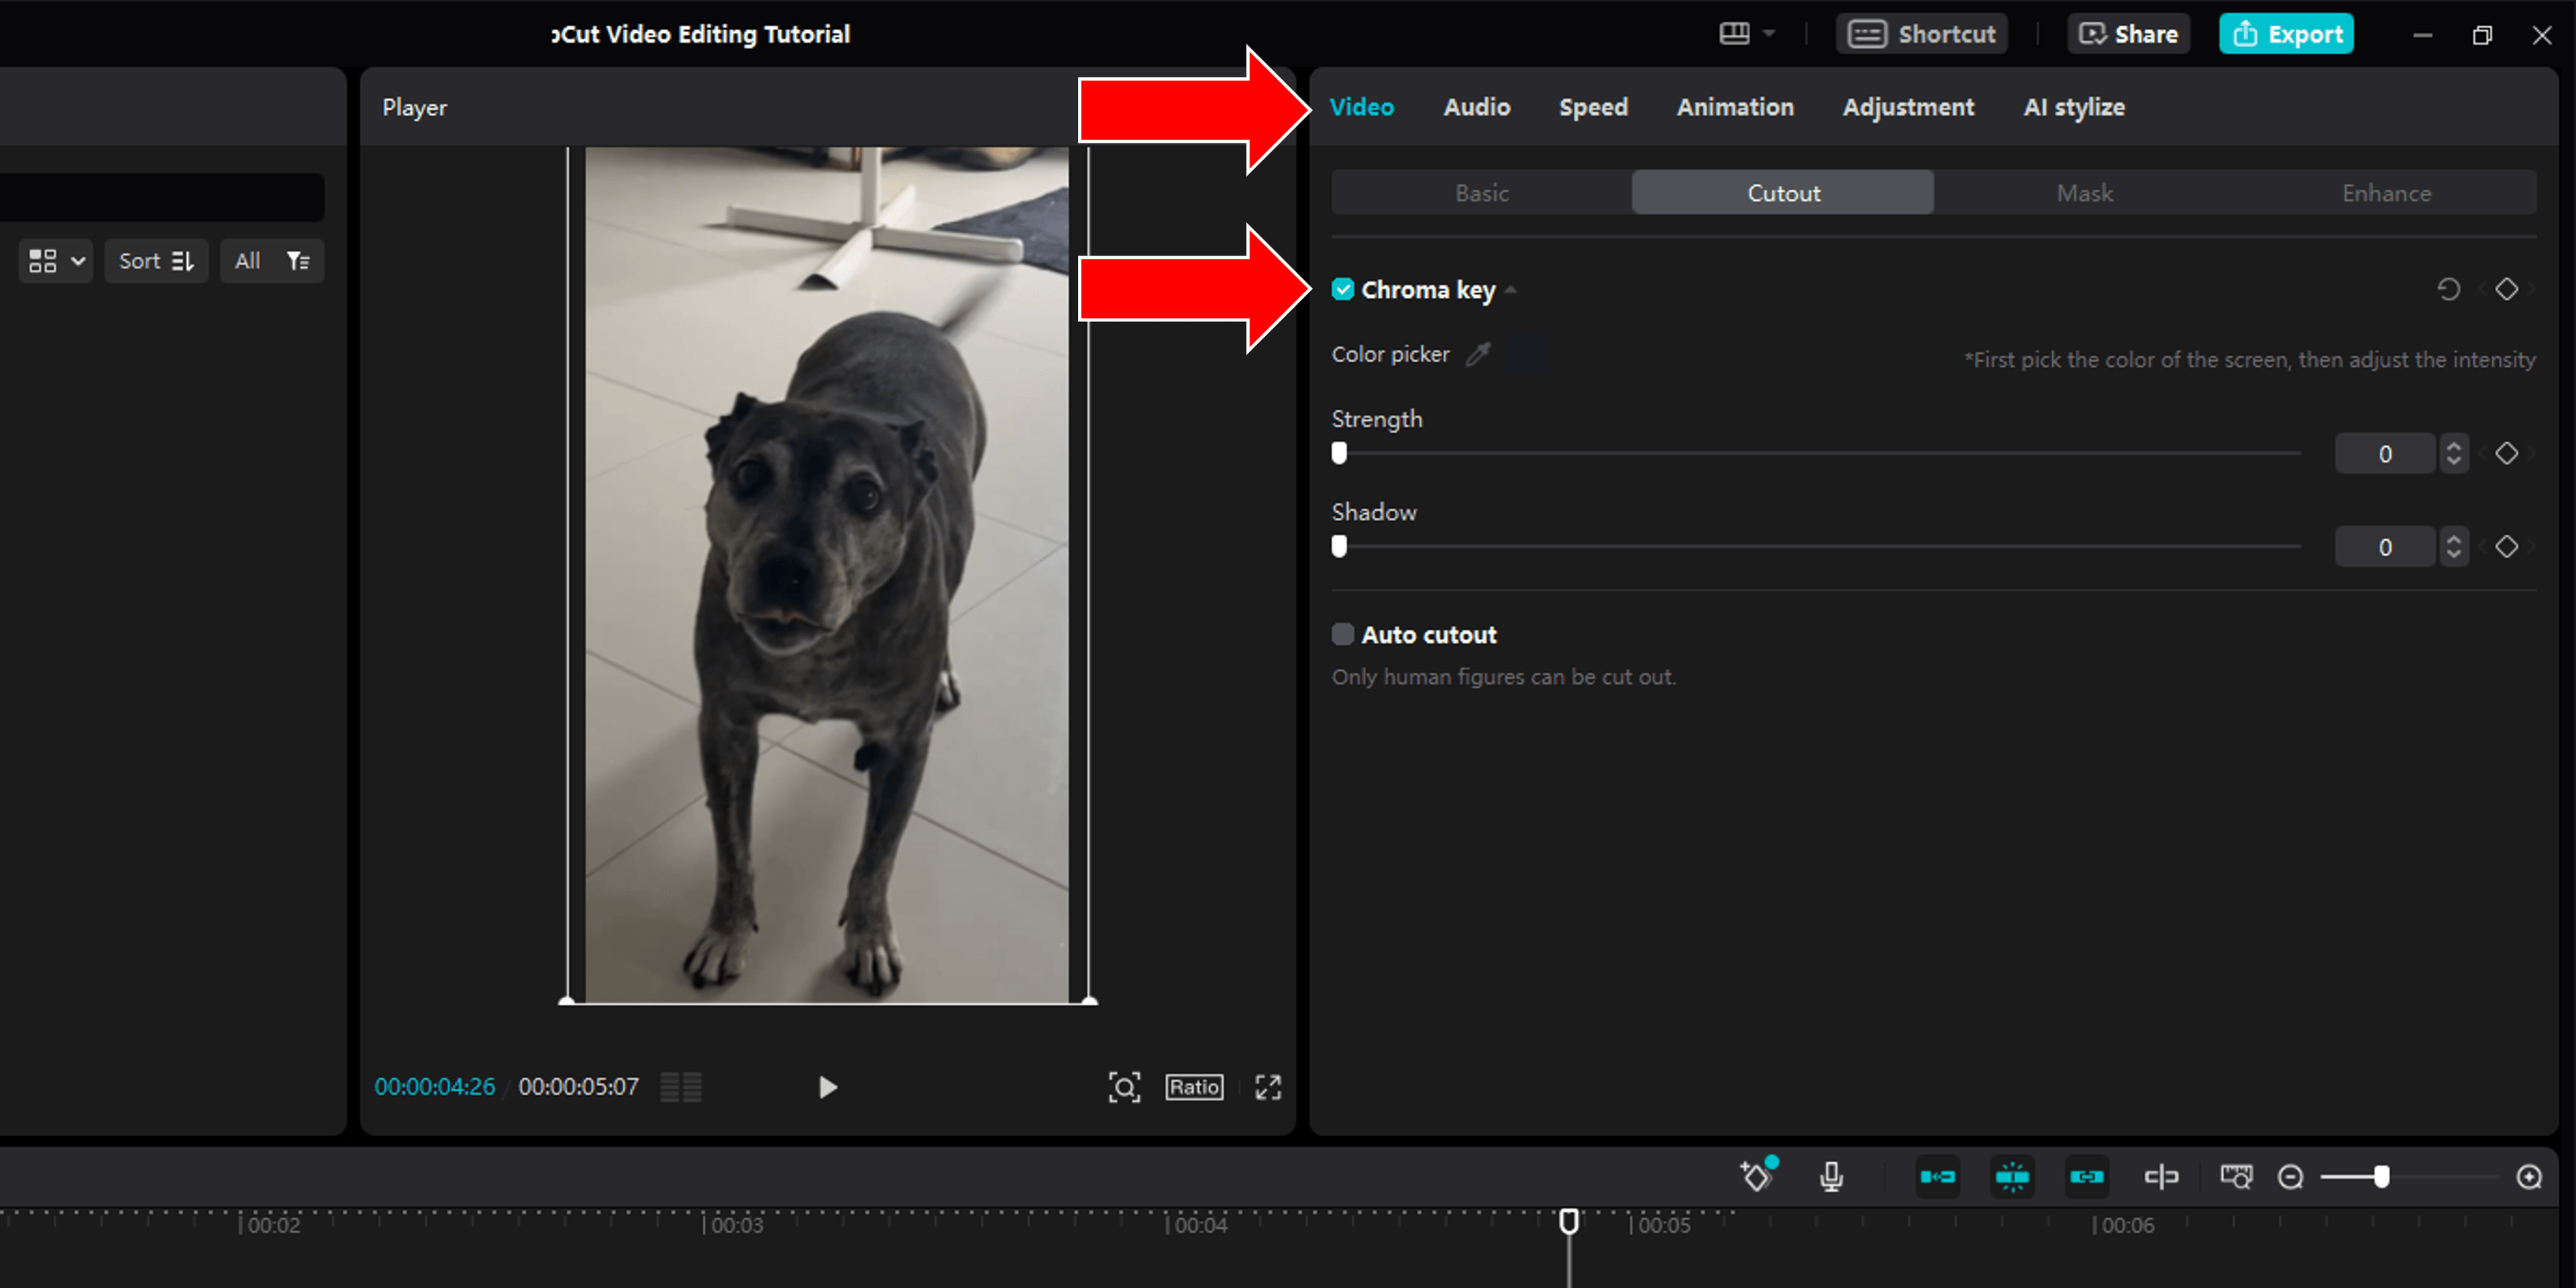
- Click to select the clip you want to remove green screen or background footage from
- In the Settings Panel in the top right, Click Video > Cutout > Chroma Key
- Use the color picker to select your green screen clip
- Adjust the intensity using the Strength and Shadow sliders
It's that easy!
Make a Transition Using the Auto Cutout Feature
Green screen videos and footage that has had the background automatically removed is a great way to level up your video editing skills and make some really cool transitions.
Here's a brief guide on how to create a wicked transition using the auto cutout feature and custom background media.
Step 1: Prepare Your Layer
- Select the layer you want to make a cutout of, hold option or alt on your keyboard, click and drag you clip and add it to a second layer on your timeline.
Step 2: Apply Auto Cutout
- With the clip selected, navigate to the 'video' tab, then the 'cutout' subtab.
- Choose 'Auto cutout'. Wait for it to process, then turn off the layer beneath it to see the cutout.
Step 3: Insert a Background
- Import a new motion background from your media pool (you can find some free motion backgrounds by entering your email at the start of this article).
- Fit the background to your frame by rotating and scaling, and place it between the two cutout layers on the timeline.
Step 4: Transition the Background
- Determine when you want the background to appear, and trim the start of the background clip to this point.
- To transition the background smoothly into view, keyframe the opacity starting from 0%, moving to 100% where you want the transition to finish.
Step 5: Implement the Fade and Slide
- Make the text fade by creating a keyframe at the start of the opacity point, move a few frames forward, and bring the opacity down to zero.
- Create a sliding effect by keyframing the 'position' where you want the slide to start and move it off screen a few frames later.
Auto Cutout Stroke Settings in CapCut
When applying auto-cutout to your footage in the CapCut app, you'll see a small dropdown arrow called "Stroke", click it to access the additional stroke settings.
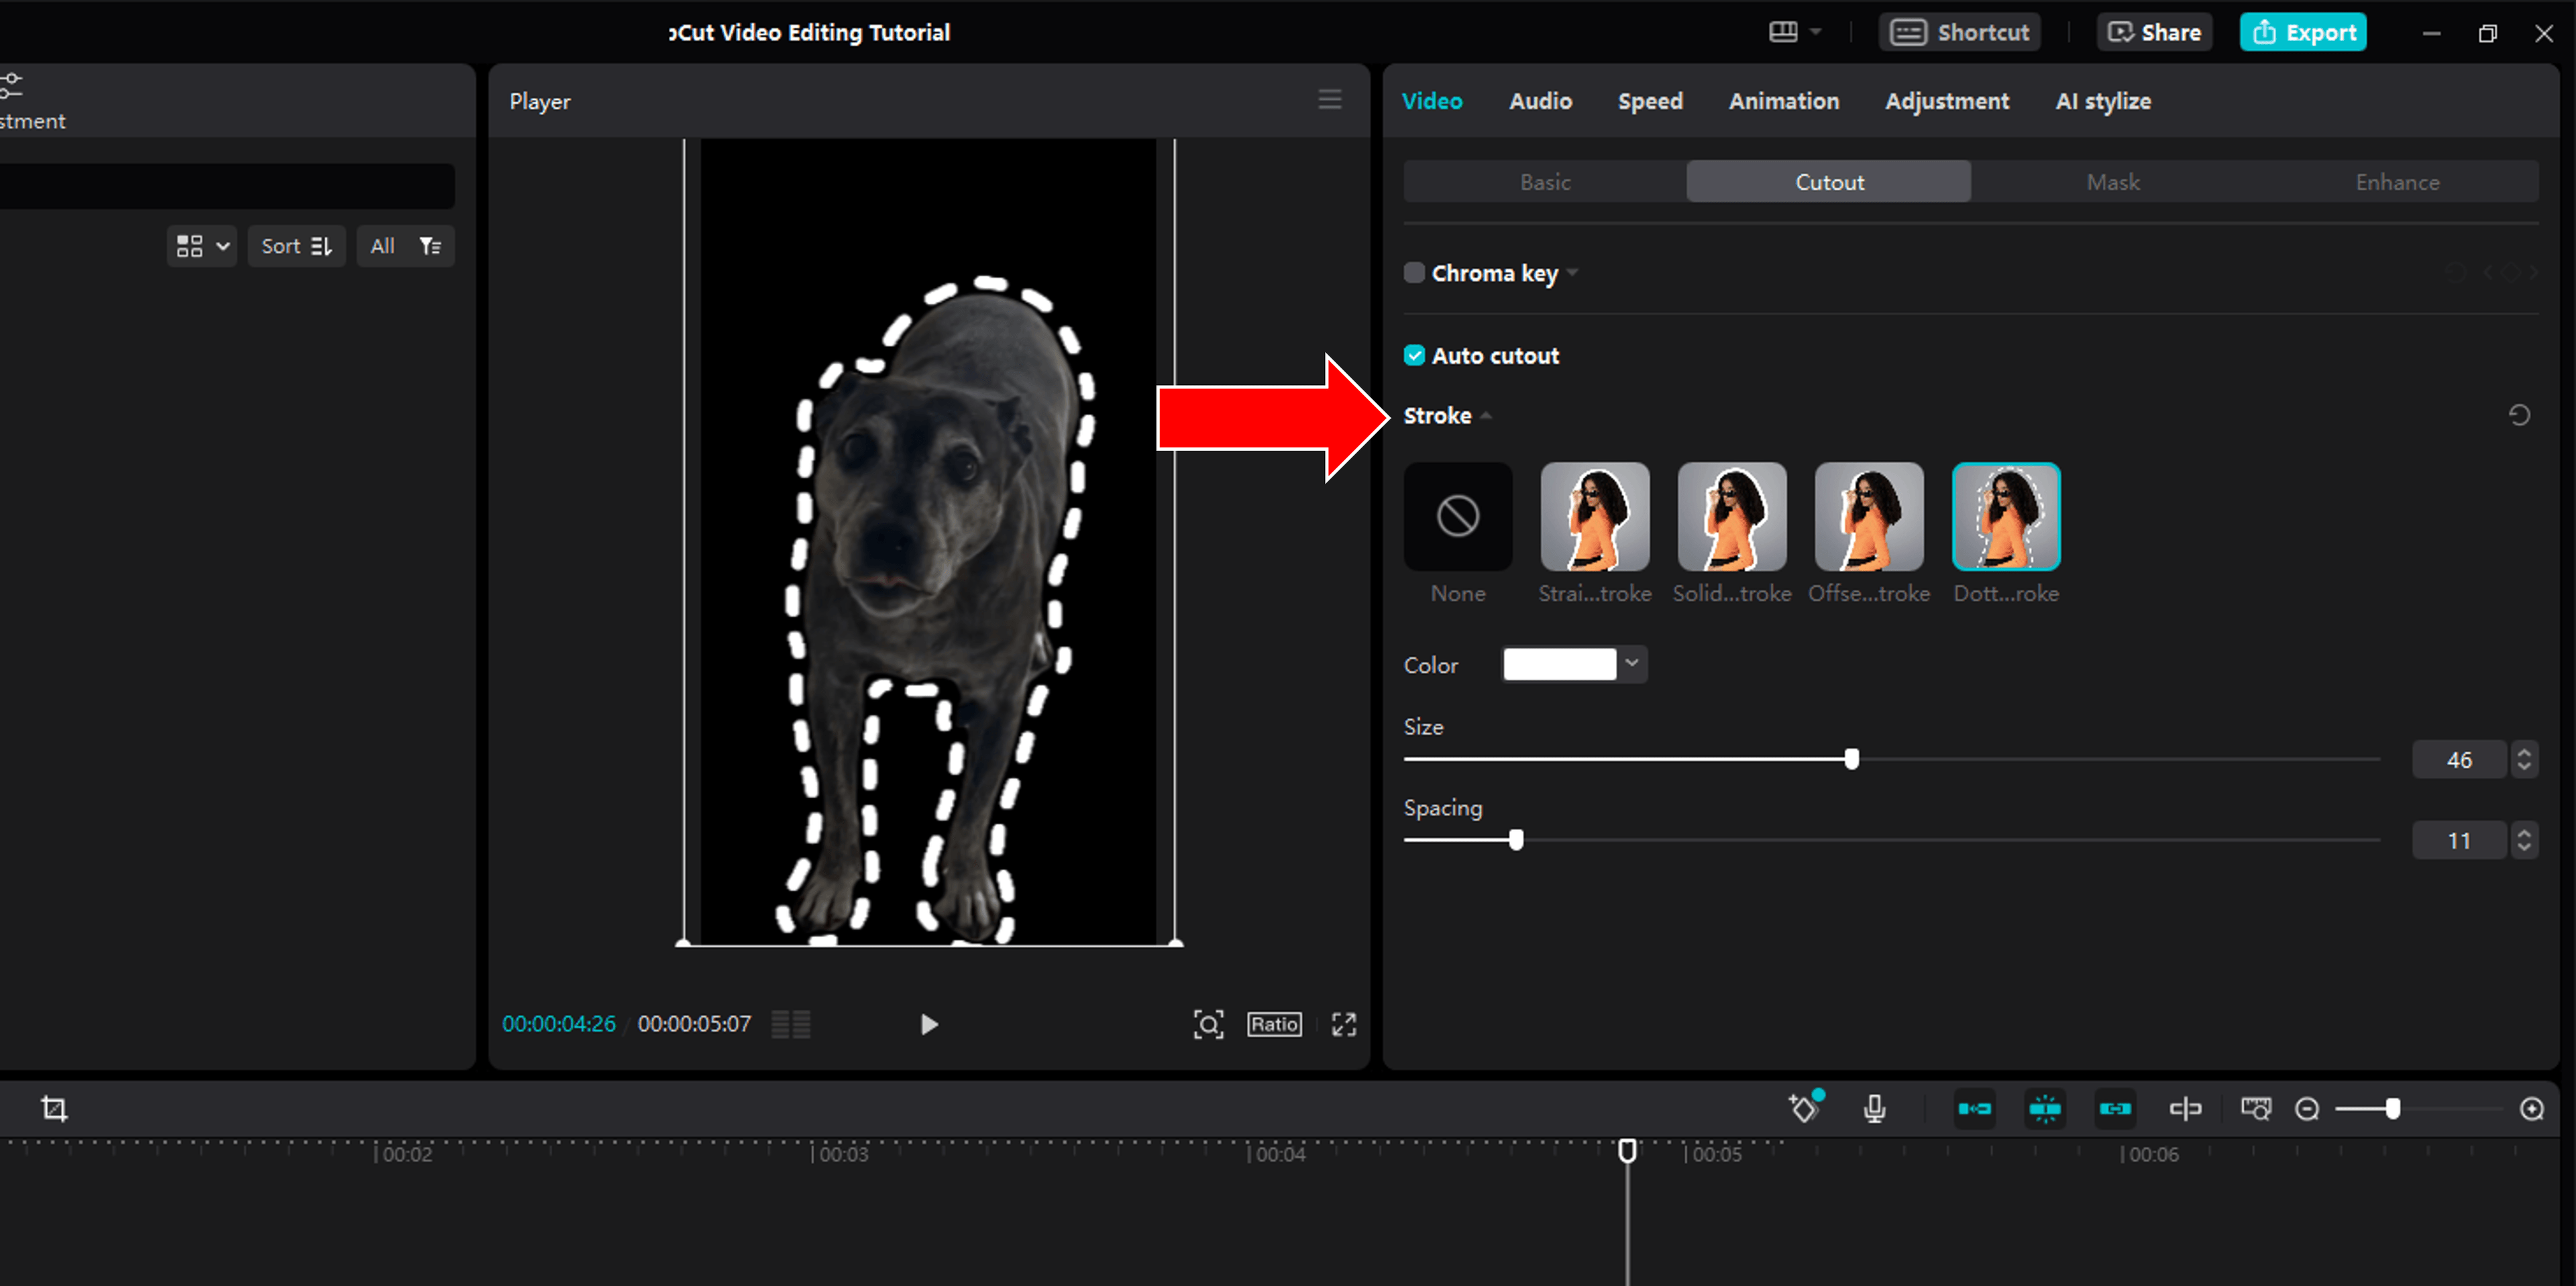
There are 5 stroke settings to choose from: None, Straight, Solid, Offset, and Dotted. Select your desired stroke setting by clicking the icon.
From here, you can choose the color, size, and spacing of your stoke setting.
The auto cutout stroke setting is a great way to add some extra wow factor into your next project!
Chroma Key Effect vs Auto Cutout: What's the Difference?
The Chroma Key effect and Auto Cutout are both features provided by CapCut for video editing, particularly in dealing with green screen features.
The Chroma Key effect removes a specified color, typically a green screen overlay, and makes it transparent, ideal for customizing your own green screen video, or green screen video you've found on the internet.
On the other hand, the Auto Cutout is a background remover feature primarily designed for footage that has a non-green screen background.
It automatically detects and removes the background, simplifying footage editing. However, it may not work as effectively on animal subjects or other non-human objects (for now).
Overall, Chroma Key is useful for background removal when the footage needs to be super precise and exact - like that needed for special effects or high-budget productions. Auto cutout is usually good enough for most creators just looking to add a neat effect to their video edits.
Wrapping Up
Mastering the green screen feature in CapCut transforms you into a more versatile video editor, allowing you to add another tool into your bag of editing tricks.
Whether you're working with a green background for a high-precision project or just spicing up your content, the tools at your disposal - Auto Cutout and Chroma Key - ensure you have the tools necessary for the job.
Embrace these features to elevate your storytelling, engage your audience, and enhance every project you undertake with CapCut. Happy editing. 😎

Anthony Gallo
Anthony Gallo is the cofounder of ContentCreator.com and lead educator in the online course 14 Day Filmmaker, that has taught over 100,000 aspiring creators how to shoot & edit professional video content with PRO and SMARTPHONE cameras.
Having created content in a variety of industries including commercial advertising, weddings, music videos, and hundreds of youtube videos, Anthony has amassed over 50 million views online and is constantly looking for new and engaging ways to create content and help others master this amazing craft.