How to Add Keyframes in Premiere Pro: 4 Simple Steps
Last UpdatedOctober 2, 2023
by
Anthony Gallo

Adding keyframes in Adobe Premiere Pro is one of the foundational skills anyone involved in video editing needs to understand. The good news is, it's actually simple once you've spent some time understanding keyframes.
Whether you're new to Premiere Pro or just need a refresher, this step-by-step guide will walk you through the process. We'll cover topics like how to add keyframes in Premiere Pro, how to use the Effect Controls panel, and how to set up multiple keyframes for complex sequences.
How to Add Keyframes in Premiere Pro?
Add keyframes in Premiere Pro by importing your video clips, using the Effect Controls panel to set your first keyframe, add multiple keyframes for complex animations, and finalize your video editing with precise adjustments. Let's take a closer look.
Step 1: Import Media and Navigate to Effect Controls Panel
- Import Video Clips: Begin by importing your video clip or other assets into Adobe Premiere Pro as you usually would. Once imported, drag the video clips onto your timeline panel.
- Timeline Panel & Effect Controls: Navigate to the timeline panel and select the video clip you want to add keyframes to. Once selected, navigate to the Effect Controls panel.
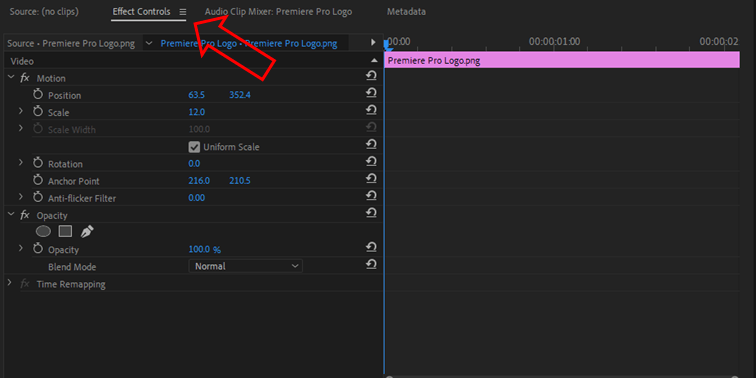
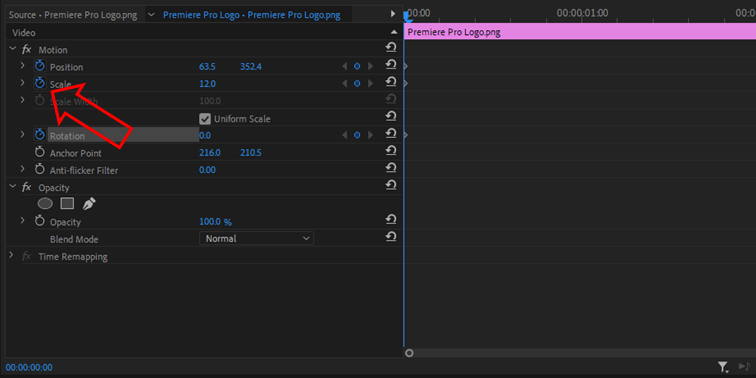
Step 2: Create Keyframes Using the Toggle Animation Icon
- Move the Playhead: Position the playhead on the timeline panel where you want your first keyframe. This is where the animation or effect will start.
- Initial Settings: Adjust the item's positioning, scale, rotation, or other feature. This sets the initial parameters for your first keyframe.
- Effect Property and Toggle Animation: In the Effect Controls panel, find the effect property you wish to animate. Next to the effect property, you will see a stopwatch icon, known as the toggle animation icon. Click it to create your first keyframe.
Step 3: Set Additional Keyframes
- Positioning Additional Keyframes: Move the playhead to another point on the timeline panel where you want your next keyframe. Make adjustments using the Effect Controls panel.
- Adding Multiple Keyframes: If you need to add multiple keyframes for more complex animations, repeat the process. You can also use the pen tool for more precise keyframe placement.
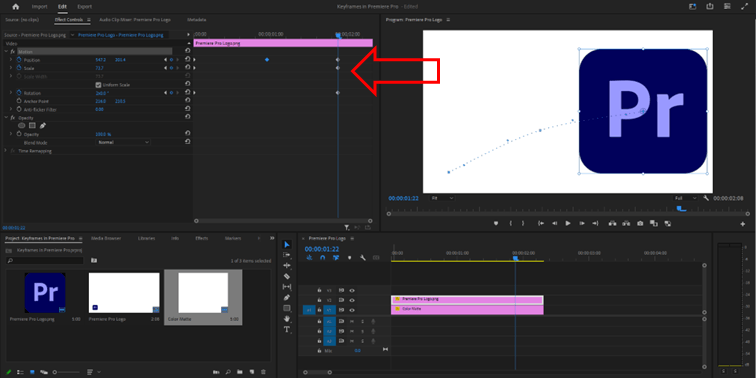
- Keyframe Navigator Arrow: Use the keyframe navigator arrow in the Effect Controls panel to jump between existing keyframes for easier adjustments.
- Value and Velocity Graphs: For advanced animations, you can utilize value and velocity graphs available in the Effect Controls panel.
Step 4: Adjust Keyframes and Finalize Your Video Editing
- Adjust Keyframes: For further adjustments, use the Effect Controls panel to modify the value graph and adjust individual keyframes. You can select multiple keyframes to adjust them collectively or use the keyframe segment pointer for finer control.
- Toggle Animation and Keyframe Navigators: Use the toggle animation button and the keyframe navigators to activate or deactivate keyframes or to move between them.
- Preview and Adjust: Finally, preview your video editing work. If everything looks good, you're all set. If not, go back and make adjustments to your keyframes.
By following these steps, you'll be well-equipped to add keyframes in Premiere Pro for all your video editing projects.

How to Remove Keyframes in Premiere Pro?
Removing keyframes in Adobe Premiere Pro is just as crucial as knowing how to add them. Here's how to go about it:
Step 1: Select and Remove Keyframes
- Navigate to Effect Controls: Open the Effect Controls panel and locate the timeline where your keyframes are present.
- Select Keyframes: You can right-click on the desired keyframe in the Effect Controls timeline, or use the keyframe navigator arrow to highlight the keyframe you wish to delete.
- Delete Keyframes: Right-click and select 'Clear' to remove individual keyframes or just click and delete.
Step 2: Batch Removal of Keyframes
- Toggle Animation Icon: To remove all keyframes associated with a specific effect property, click the toggle animation icon next to the effect property's name in the Effect Controls panel.
Step 3: Confirm and Review
- Timeline Scrubbing: After deleting keyframes, scrub through the timeline panel or play the sequence clip back to ensure that the keyframe removal meets your expectations. If you make a mistake you can always undo with CTRL/Command + z.
How to Change Keyframe Values in Premiere Pro?
Here's how to modify existing keyframes:
Step 1: Select Keyframe for Adjustment
- Find Your Keyframe: Navigate to the Effect Controls panel and use the keyframe navigator arrows to navigate the playhead the keyframe you want to modify.
Step 2: Make Adjustments to Keyframe Values
- Adjust Effect Property: With the keyframe selected, you can alter the parameters of the effect property. Your adjustments will automatically update the existing keyframe.
Step 3: Modify Timing of Keyframes
- Drag and Drop: Click and drag the selected keyframe in the Effect Controls timeline to your new desired time.
Step 4: Copy and Paste Keyframes
- Duplicate Keyframes: To replicate keyframes, simply select them and use the copy and paste commands. This is useful for duplicating specific effects or movements.
Step 5: Update Animation Curve
- Right-Click Options: Right-click on the keyframe icon in the Effect Controls panel, and select the desired curve type like Ease In, Ease Out, or Linear for controlling the pacing of the animation.
- Advanced Animations: You can also click the drop-down arrow to the left of the Stopwatch icon allowing you to create custom curves for your keyframe graph.
Step 6: Review
- Final Playback: After making all adjustments to your keyframes, it's important to review your work in the timeline panel to ensure it aligns with your creative vision.
Why Are Keyframes in Premiere Pro Useful?
Knowing how to add keyframes in Premiere Pro is useful for a range of reasons and learning keyframes should be on every editor's to do list. Here are some of the useful applications of keyframes in Premiere Pro:
- Dynamic Control: Keyframes enable you to apply dynamic changes over time within a video sequence. You activate keyframes for various parameters, like position, scale, or effects, thus giving you a higher level of control.
- Custom Transitions: By adjusting keyframes, you can create custom transitions that can't be achieved with preset video effects.
- Smooth Animations: With at least two keyframes, you can create a smooth transition between different states of an object or effect, adding sophistication to your video content.
- Precise Timing: You can show video keyframes on the timeline, offering a clear visual representation for precise timing adjustments.
- Flexibility: You can easily modify or delete keyframes if the need arises, offering adaptability during the editing process.
Wrapping Up
Having a solid grasp of keyframes in Premiere Pro empowers you to elevate your video editing projects and make custom transitions and animations.
From the simple tasks of adding and removing keyframes to the more technical techniques of fine-tuning and modifying them, you should now be equipped with the tools to make your customized visions come alive. Happy editing!

Anthony Gallo
Anthony Gallo is the cofounder of ContentCreator.com and lead educator in the online course 14 Day Filmmaker, that has taught over 100,000 aspiring creators how to shoot & edit professional video content with PRO and SMARTPHONE cameras.
Having created content in a variety of industries including commercial advertising, weddings, music videos, and hundreds of youtube videos, Anthony has amassed over 50 million views online and is constantly looking for new and engaging ways to create content and help others master this amazing craft.