Best Guide to DaVinci Resolve Color Grading and Correction
Last UpdatedOctober 13, 2023
by
Anthony Gallo
When it comes to professional video production, DaVinci Resolve is well known for being the best video editing package for color grading and correction. This is largely due to DaVinci Resolve's origins as a color correction tool.
The terms color grading and color correction get thrown around in the world of video editing and are quite often used interchangeably, but there are some distinct differences in the two.
Color correction is like adjusting a photo so that everything looks natural and true to life, while color grading is like adding a filter to that photo to give it a specific mood or feel.
In this article, we'll learn the ropes when it comes to DaVinci Resolve color grading and correction. I'll also outline an optimal color grading workflow so you can get started right away.
Introduction to the DaVinci Resolve Color Page Layout
The DaVinci Resolve Color Page layout can be intimidating at first. It provides a blank slate, allowing you to start grading in DaVinci Resolve by adding nodes to the node tree.
So if you're trying to grade LOG footage or just want to learn the ropes, let's take a look at the key panels and displays so you can quickly get a feel for it.
1. Color Management Panel
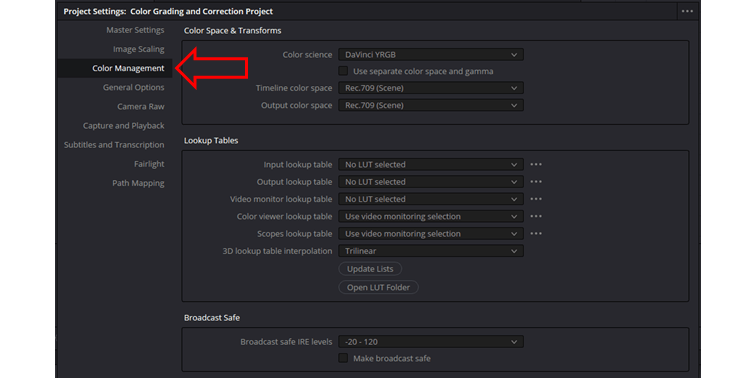
Click the gear icon in the bottom right hand corner of the DaVinci Resolve user interface, this will open the Project Settings panel. Navigate to the Color Management tab.
The Color Management tab allows you to set up and control how colors are handled throughout your project. You can select the color science model, define the input and output color spaces, and import and manage your best LUTs (Look-Up Tables).
This panel ensures that you achieve consistent and accurate color representation from the source footage to the final output.
2. Color Controls Toolbar
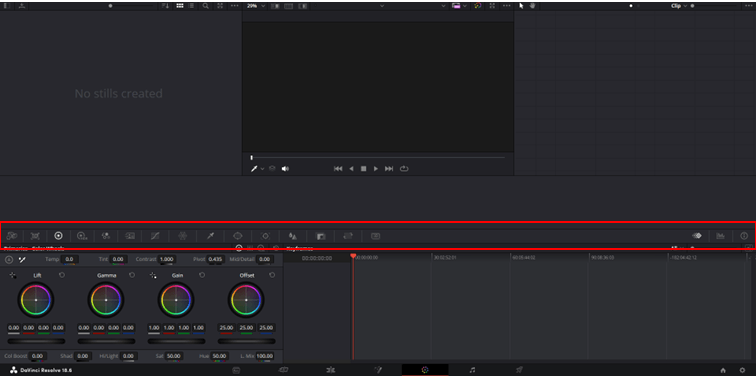
The DaVinci Resolve Color Controls Toolbar is where you'll find all the important color grade and correction tools in DaVinci Resolve.
You'll find everything here from color wheels, HDR grade, RGB mixer, motion effects, color warper and many more features for color grading.
As you dive into color correction and grading you'll be using each of these tabs for different jobs. Hover your mouse to see exactly what each tab is if you're not sure and don't be afraid to have a look around in the meantime.
3. Stills Gallery

The Still Gallery panel allows you to create references from different shots, aiding in your color grading and color correction workflow. The stills can also contain specific color grades which you can copy directly onto other clips.
4. Main Display
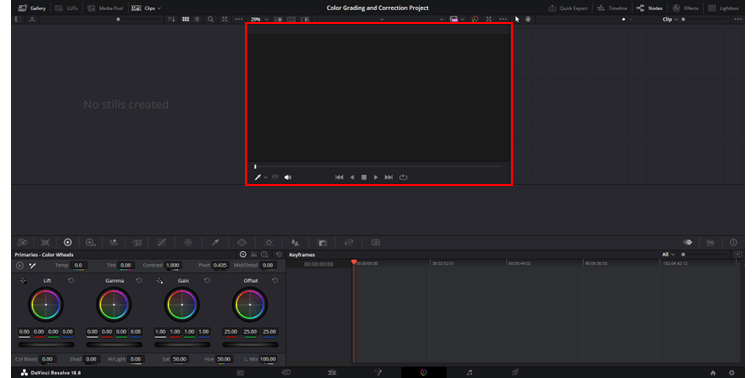
The Main Display offers an interactive viewer central to the color page. The display has a range of functionality in the color grading and correction workflow.
As you might expect the viewer displays the frame in alignment with the playhead position on the timeline.
The main display features tools such as Image Wipes and Split Screens, aiding in accurate color space adjustments and matching. The Highlight view refines secondary corrections and you can swiftly toggle between Enhanced, Full Screen, and Cinema Viewers.
5. Node Editor
The Node Editor in DaVinci Resolve's Color page is important for structured color grading and correction workflows.
It visualizes the signal path of your image processing, allowing for non-destructive and layered adjustments.
Each node represents specific color corrections or effects and you'll get used to creating serial, parallel, or layer nodes and fine-tuning individual aspects of a shot.
You might be surprised at just how intuitive the node editor actually becomes for color grading. Connecting nodes in a logical sequence allows for complex grading tasks to remain relatively simple.
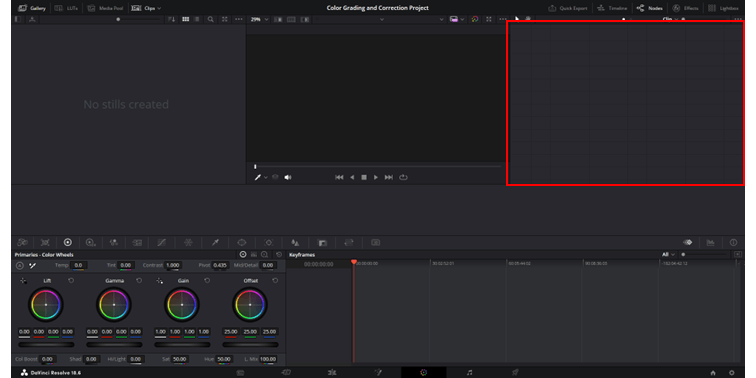
6. Timeline
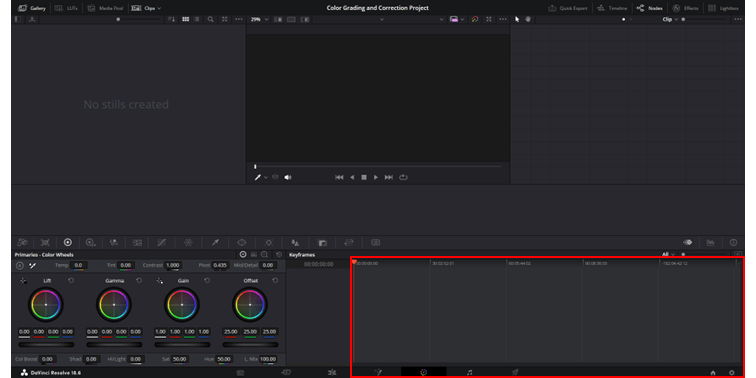
The color space timeline in DaVinci Resolve presents a linear view of clips and is used for navigation during color grading and correction.
It displays the sequence of clips from the Edit page, providing a visual reference for grading continuity. You can swiftly jump between clips, compare color adjustments, and ensure consistency across scenes.
Thumbnails give a quick visual cue, and markers indicate areas needing attention.
7. Color Palette
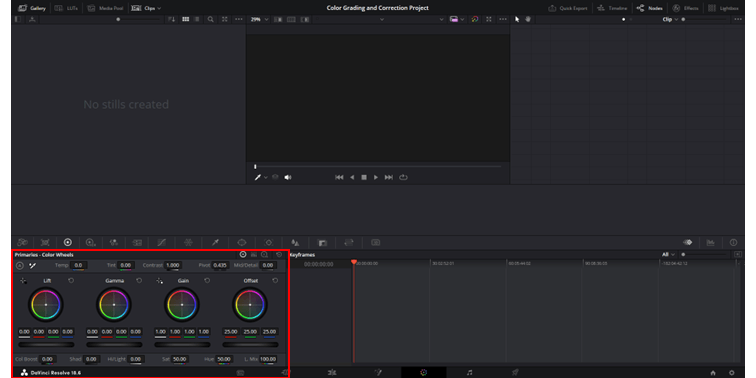
The color palette is where the magic happens.
The color palette is home to all the essential color grading tools like primary wheels for broad adjustments and secondary tools for targeted corrections.
You'll be able to modify lift, gamma, gain, and offset to influence shadows, mid-tones, and highlights. The palette facilitates color balancing, saturation control, and luminance adjustments too.
Guide to the DaVinci Resolve Color Grading and Correction
1. Color Management
When you dive into Davinci Resolve color, the first step is to set up color management. Navigate to the bottom right corner to access project settings and then to color management.
Adjusting your timeline color space, like selecting DaVinci WG/Intermediate, can help in achieving the desired look for your clips.
2. Adding LUTs
Look-Up Tables (LUTs) are a quick way to apply a color grade to your footage. DaVinci Resolve supports a wide range of LUTs. Adding a LUT can give your footage a cinematic color grading or match the color science of different cameras. However, it's essential to remember that LUTs are a starting point. For a professional color grade, adjustments might be needed even after applying a LUT.
3. Monitor Calibration
It's essential to calibrate your computer monitors and use the right color profiles to ensure that what you see during editing in Davinci Resolve matches the final exported version. In the Color Management tab in Project Settings, find out the appropriate Output color space setting for your monitor.
Before you export, you should also make sure you've got the appropriate render settings to ensure your color correction and grading transfers well to the final product.
4. Basic Color Correction
Begin with primary tools such as primary wheels (lift, gamma, gain) to adjust tonal range, dynamic range, and overall balance. Adjusting tools like primary bars can help in setting the desired look and mood.
Adjusting the white balance ensures that whites appear white, eliminating any unwanted color casts.
The RGB mixer and RGB curves allow for more intricate adjustments, impacting RGB values, and overall color temperature.
5. Advanced Color Correction and Grading Tools
Use power windows and the qualifier palette to make secondary color correction. This is crucial for isolating and adjusting specific areas, such as skin tones.
The node editor provides a visual representation of your grading steps, allowing for complex corrections and cinematic color grading.
Explore advanced tools like color boost, color wheels, and log wheels for more refined adjustments.
6. Exposure Adjustments
Adjusting exposure ensures that your footage looks correctly lit. Tools like the center palette and primary grade help in refining the exposure of the entire image.
7. Adding Effects
Effects like glow can be added for an atmospheric touch. This is useful for achieving specific moods or emulating the looks of feature films.
Vignettes can be added to draw attention to the center of the frame, providing a professional color touch.
8. Finalizing Your Grade
Once you're satisfied with your color grade and correction in DaVinci Resolve, ensure that all the clips in your media pool are consistent. The shot match tool can be beneficial for this, ensuring a consistent look across different shots.
Always preview your grade in full screen to get a holistic view before finalizing.
DaVinci Resolve Color Grading and Correction Workflow
Log footage, a flat format maximizing a camera's dynamic range, benefits from DaVinci Resolve's features. The software's color page aids in transforming flat footage to a standard profile, enabling foundational color grading.
Techniques include using the node editor, primary wheels, and color boost. The raw file adjustments, combined with secondary color correction tools like power windows, ensure precision.
DaVinci Resolve 18 enhances the grading tools further. From basic color correction to cinematic color grading, DaVinci Resolve streamlines the workflow.
Although this video is specifically for Premiere Pro, there's some excellent tips for color grading LOG footage you can use in your workflow.
Color Correction vs Color Grading: What's the Difference?
Color correction and color grading are distinct processes in post-production. Color correction involves adjusting RGB values, ensuring consistency across different shots, and normalizing the dynamic range.
It fixes color imbalances, aligns RGB channels, and sets the right color temperature. The media pool and primary tools in software like DaVinci Resolve assist in this foundational step.
Color grading, on the other hand, is artistic, shaping the desired look and specific mood. Using advanced tools like the RGB mixer, color boost, and center palette, professionals manipulate tonal range and color values.
While correction standardizes footage, grading personalizes it, making feature films uniquely expressive.
Wrapping Up
Today we learned a basic intro to color correcting and grading in DaVinci Resolve.
Using the basic tricks outlined here you should be well on your way to start looking at more advanced color grading techniques!

Anthony Gallo
Anthony Gallo is the cofounder of ContentCreator.com and lead educator in the online course 14 Day Filmmaker, that has taught over 100,000 aspiring creators how to shoot & edit professional video content with PRO and SMARTPHONE cameras.
Having created content in a variety of industries including commercial advertising, weddings, music videos, and hundreds of youtube videos, Anthony has amassed over 50 million views online and is constantly looking for new and engaging ways to create content and help others master this amazing craft.